Plastic Pinhole Camera
aka PlastiCam45
About 6 months ago I bought a 4x5 pinhole camera and have been having a blast while using the thing. I got to thinking that the 3D printer might be ideally suited to build one from scratch. My initial plans were to make one out of some sort of cool wood like Cocobolo, but knowing my wood working skills, I elected to 3D print one out of PETG.
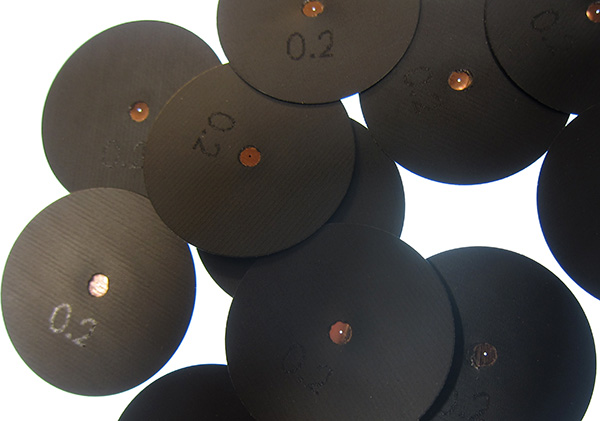
As the first camera was a 75mm focal length, this camera will be 141mm focal length. Firing up Alibre Design Expert, I put together a series of parts that would be easily printed and not terribly difficult to assemble. The first order of business was to figure out how to make the pinhole needed for the camera. Best option and for consistency was to purchase a pre-made pinhole. These were sourced out of the EU, from Reality So Subtle. A set of 5 assorted sizes cost about $40 shipped. Details about the pinholes can be found here. Image of the pinholes from his website.
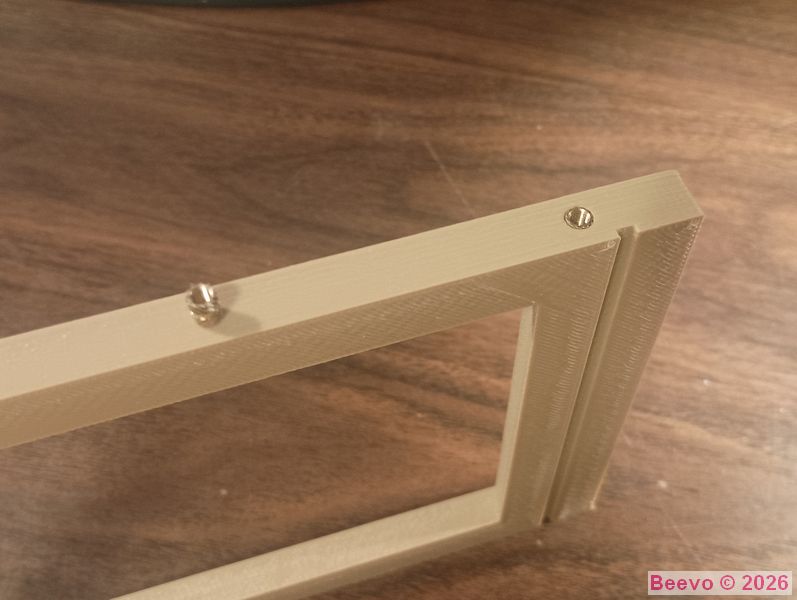
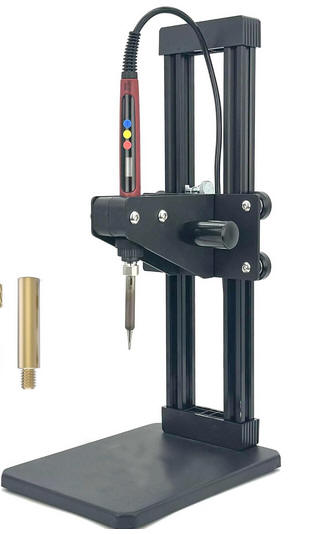
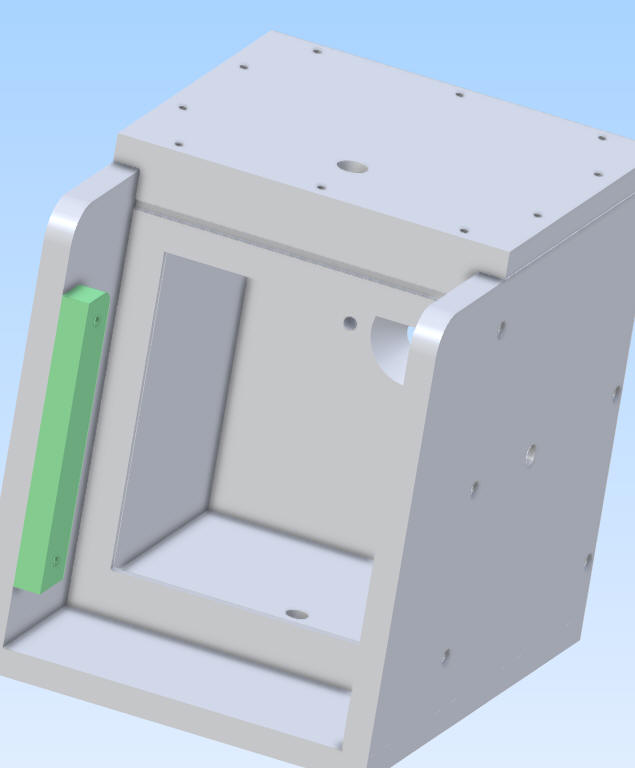
The first part to be designed was the frame that the film holder fits against, the rest of the camera was designed around this first part. A locating groove was designed into the face to retain the film holder securely. I have a device that sets brass inserts into 3D printer plastic (shown at right) and I used this extensively throughout the construction of the camera. The heat insert process is easy and quick and results in an incredibly strong joint. The left picture shows an insert installed with one ready to install to its left. Here are a couple of videos showing the installation process: 3mm Insert Installation and 1/4-20 Insert Installation (tripod socket) Here is a link to the press pictured.


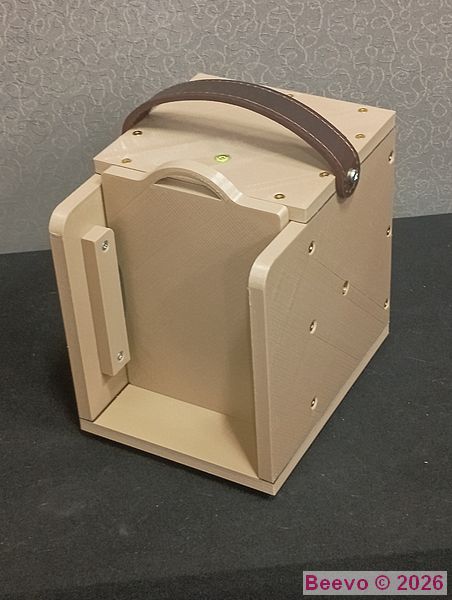
The side panel as roughly 7" wide and 6" tall. I have a small package of 10mm round bubble levels and I incorporated one into both the LH Side and Top surfaces of the camera. Placing the level on the LH side was decided by having the film holder insertion from the right when in landscape mode and the level on top.

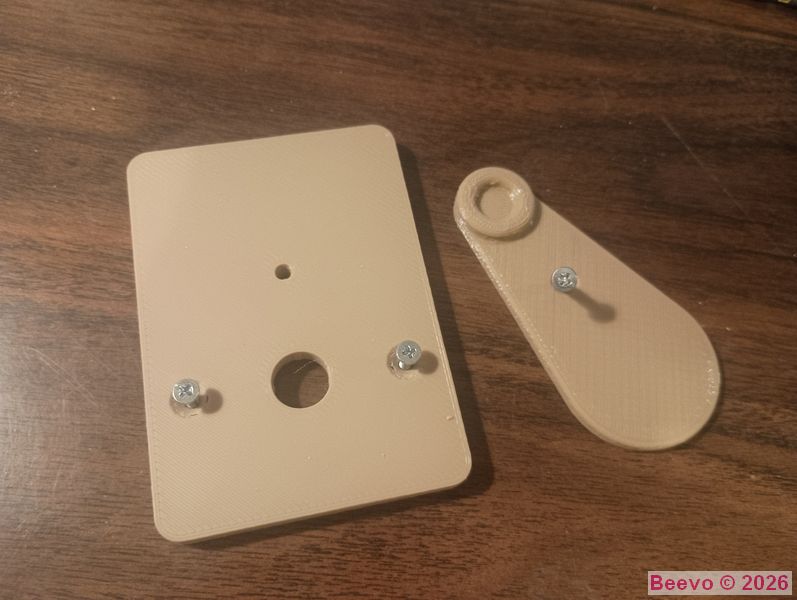
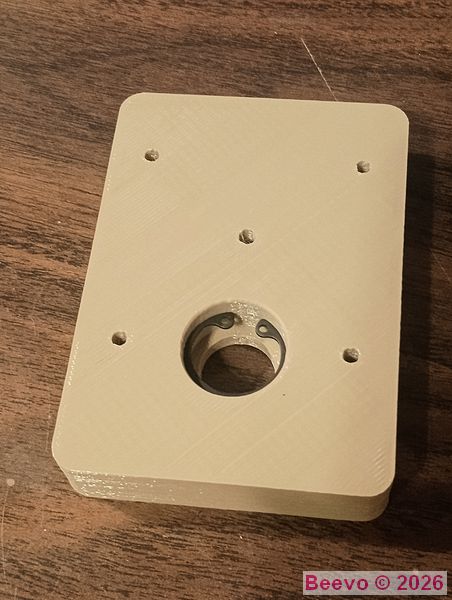
Front face has been added. So far everything is coming out nice and square and the edges align perfectly, a testimony to designing and doing a trial fit in CAD, Next addition is the "Shutter" assembly which consists of a plate to hold the Aperture disk and a shutter blade. The parts are shown on the right (print time 3 hours). The RH Side panel will be added after that when the 3D printer completes printing (11 hours).
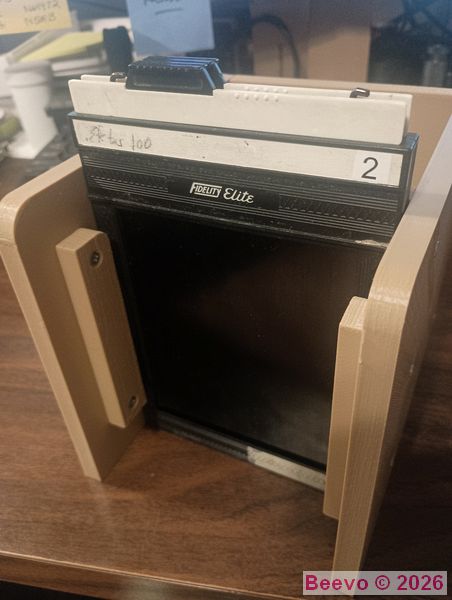
The RH Side Panel finished printing and has been added to the camera along with the RH side Spring clamp for the film holder. Tension is good and makes inserting/removing the film holders easy. The holder locates well in the camera.

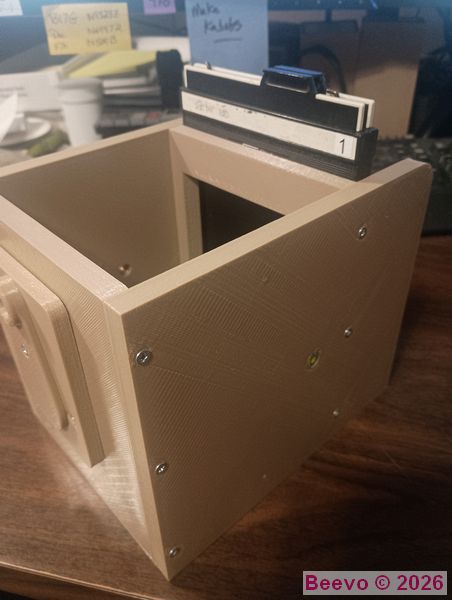
Top cover printed and installed, I ran out of 3mm brass inserts and had to wait until I got more. Bought a large quantity as I can see I will be using these a lot in future projects. I installed the same type of hand strap as I did on the wooden camera I bought.
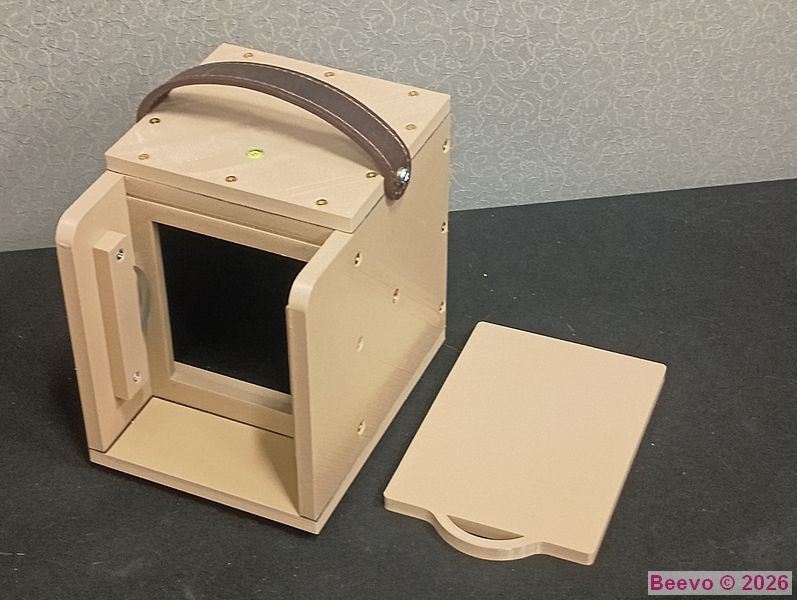
I printed a "Rear Lens Cap" to use instead of a film holder. Using a film holder might get mixed in with holders that have film in them.
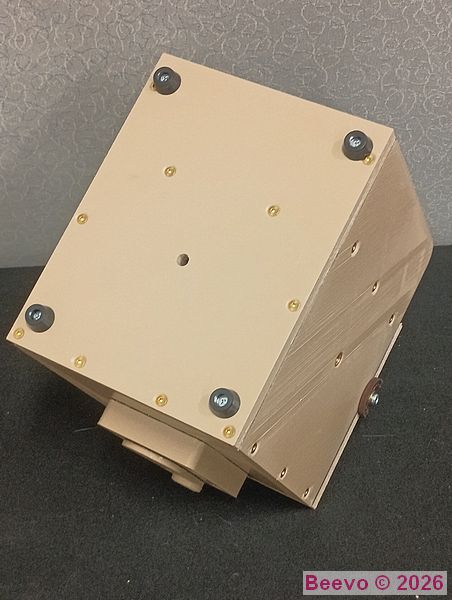
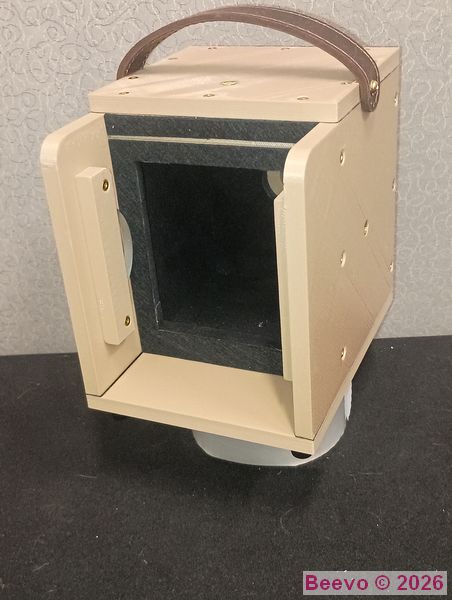
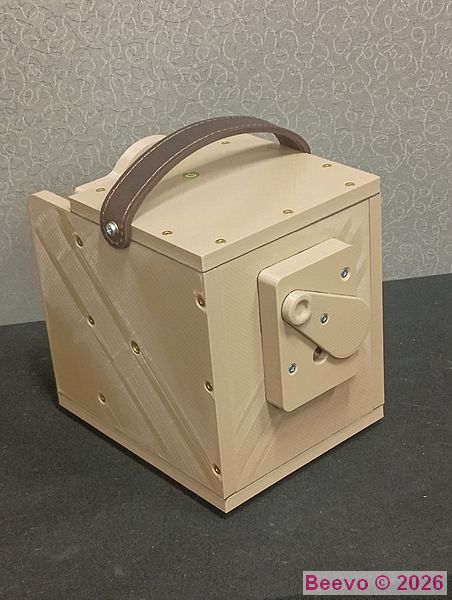
I added rubber feet as I did on the wooden camera. I printed two sets of risers for the rubber feet so it would sit on a flat surface without the Bogen tripod plate hitting. The second set will be installed on the wooden camera. I took the camera apart and lined the entire inside with 1mm sticky back felt sheet. I also applied 2mm adhesive backed felt to the face that the film holder rests against. There was a light fogging on the top end of the film without the felt added. I had to turn on the flash to see any interior detail and at that, it is still a black hole.
I had to reduce the tension on the film holder retainers as getting the holder out of the camera took a little more force than I cared for during final testing. I felt there was too much risk of pulling out a slide if you were not careful how you grab the holder. Then of course we all spin the slide locks, right?
In Alibre I moved the two mounting holes in the retainer 0.125" closer to the film holder, reprinted the parts and the resulting tension is just right. Holder is securely held but very easy to insert/remove from the camera.
PINHOLES!!
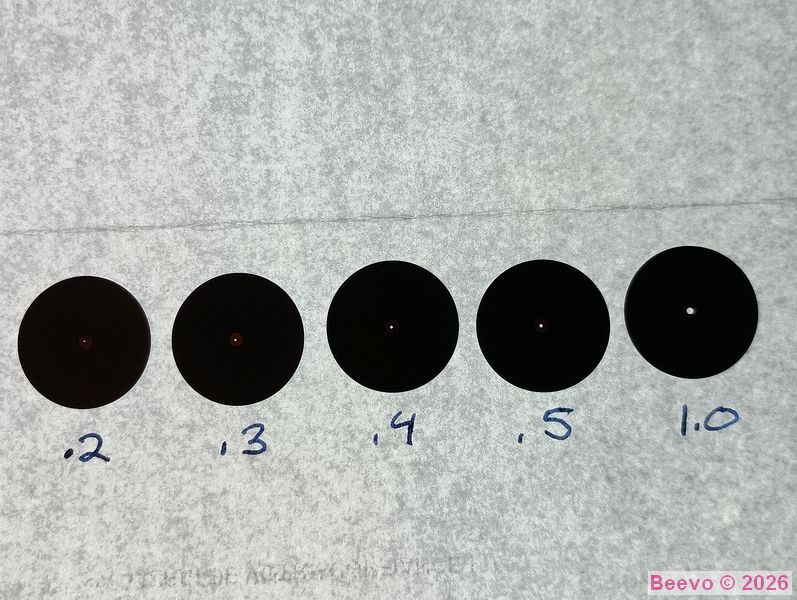

The pinhole disks arrived from France and I placed them on a light board to make seeing the TINY holes easier. Measurements are in mm!! Here is the tool I devised to check the focal length of the camera. There are two pieces of brass tubing and the one on the right can be slid in and out to adjust the length, then the joint taped to prevent movement.

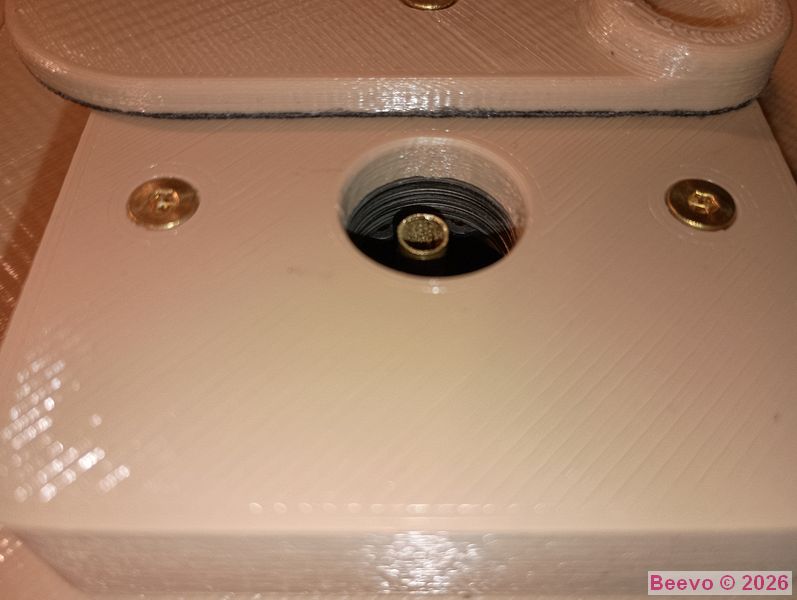
Back side of the shutter assembly showing the pocket for the Pinhole Disk. I will use a small stack of Stainless Die Shims and vary the position of the pinhole disk to adjust the focal length. An internal snap ring is being used to retain the disk and shims. I cut and installed a piece of copy paper along with two shim and the snap ring for testing.
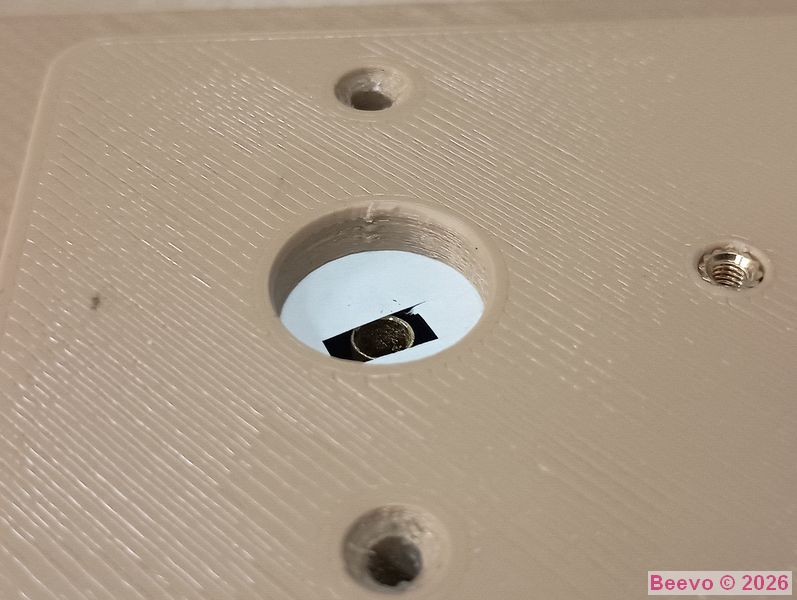
With the gauge clipped in place of the film holder you can see the tip of the brass tube. By eye it looks so close to the position it needs to be! The pinhole block shown here was installed on the camera body and I could discern no gap between the tip of the brass probe and the paper. For grins and giggles I cut a slot in the paper disk and installed it. My initial assessment was correct.


The Pinhole was installed at the bottom of the
cavity (all the way up in these views and three shim washers and the snap ring
were installed on top. Shown are a close-up of the pinhole installed in
the block and the block with the pinhole and shutter blade installed on the
camera.

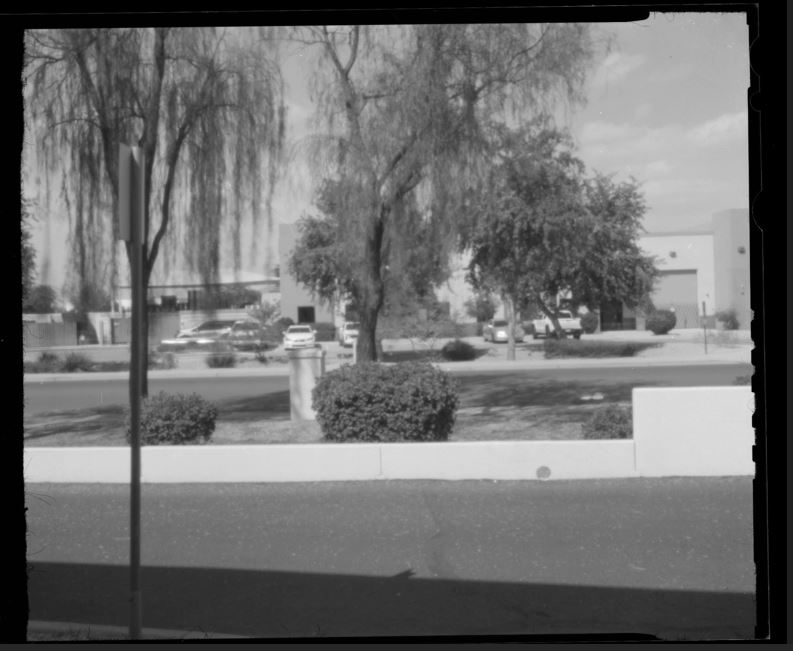
The camera after completion and a test shot from the parking lot at work. Ilford HP5 5 seconds at f 281 Developed in Ilfotec-HC 6:30 minutes 20C in Jobo CPE processor. More interesting images to follow...
June 22 2026
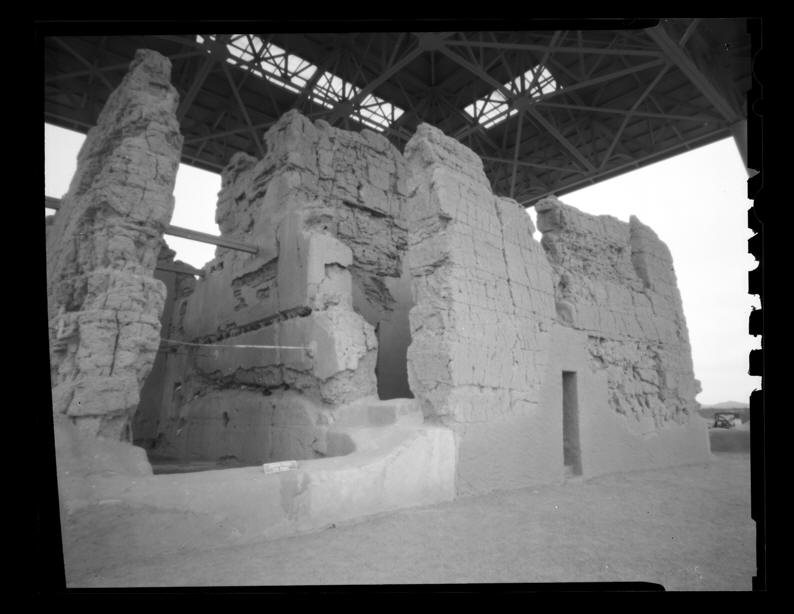
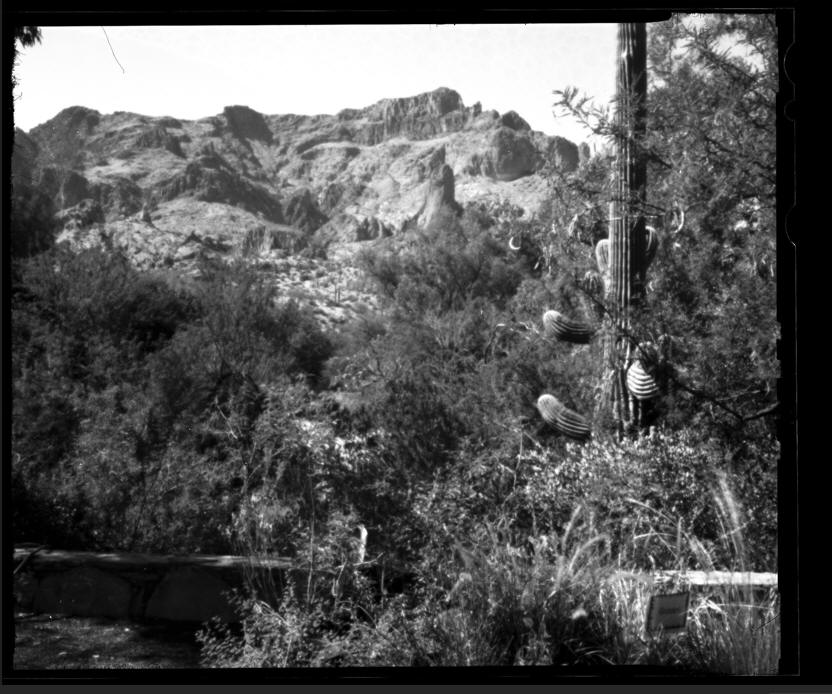
As promised, some more interesting pictures taken with PlastiCam45. LH image is the Great House at Casa Grande National Monument in Coolidge, Arizona. RH images is Trujillo Mountain (aka Picketpost Mountain) in Superior, Arizona. The shot was made from the visitor center patio at Boyce Thompson Arboretum.
I am currently testing a 35mm pinhole camera (PlastiCam35) I designed using Alibre Expert and 3D printed.
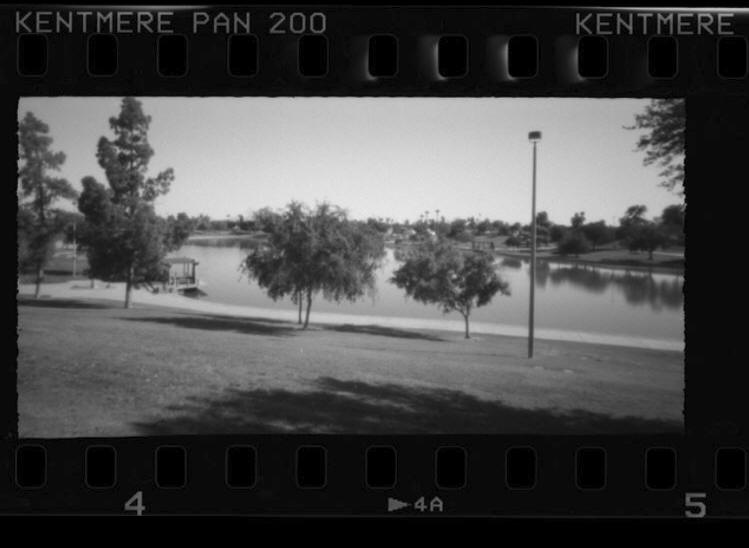
Here is a test image shot in Kiwanis Park, Tempe Arizona.