Large Format Cart
I'm not as spry as I was when I was doing Large Format 15 years ago, so hauling the new camera and all the goodies & gee-gaws now requires wheels! I bought a cheap folding shopping basket/cart to test the theory and discovered this is a good solution when hiking rough trails is not part of the plan.
That said I obtained a much better folding Cart/Basket that was a bit larger and much heavier built. This worked well until we started getting off the smooth surfaces in the various locations we visited. See the information lower on the page.
Large Format Cart II (Final?)
11/14/2025
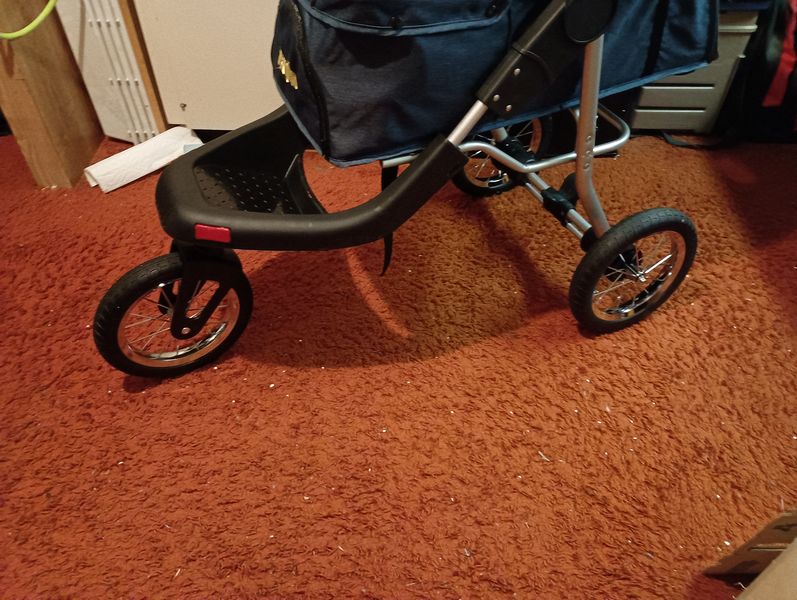
After about a year of use I have come to the conclusion the original camera cart needs to have more robust wheels as it seems we are visiting places with a fairly rough terrain. I found that the front wheel design while good for its intended purposes fights me on loose dirt/gravel surfaces and requires constant force to operate. Visiting the various Botanical Gardens and the Zoo, I kept looking at these three wheeled baby strollers and got to thinking if I could find one with a decent sized cargo area that it would be a better solution to the problem.
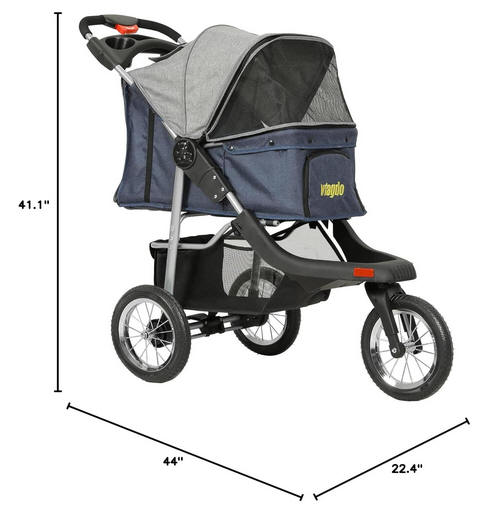
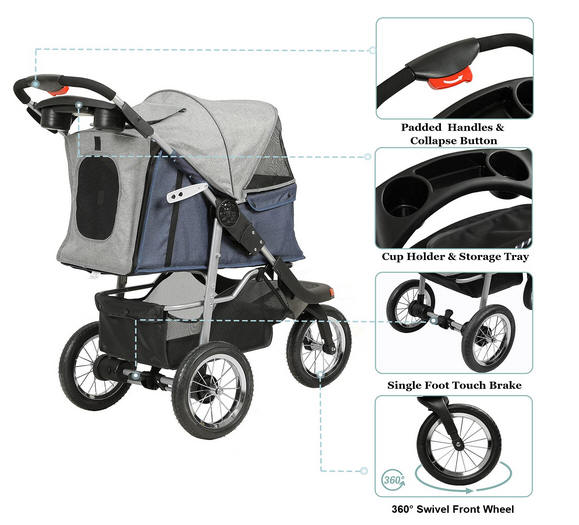
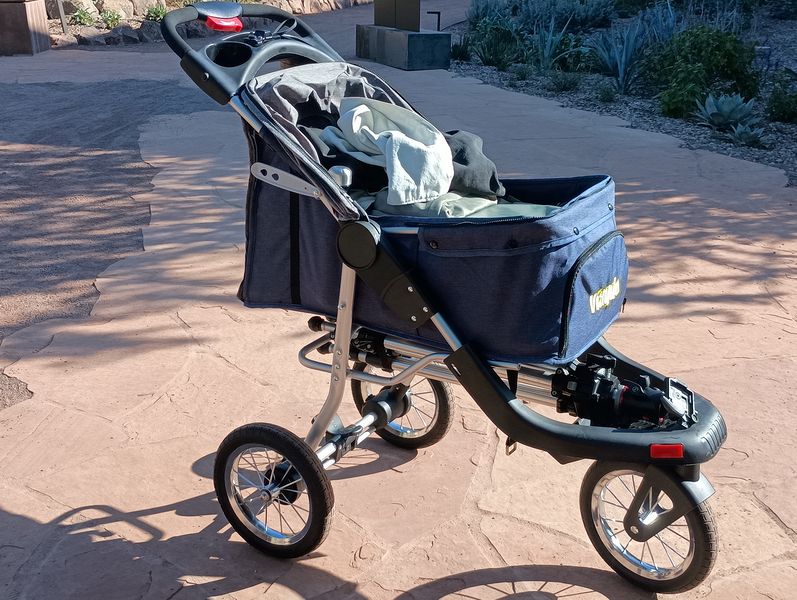
Problem solved! Extensive searching on Amazon and else where found this unit to be the closest to what I need and it was nicely priced at $125. The wheels are 12" diameter soft, solid urethane and that surely would be enough for the terrain I will be using it on. The compartment is 25" long, 12" wide and 8" tall (covers removed or folded back)
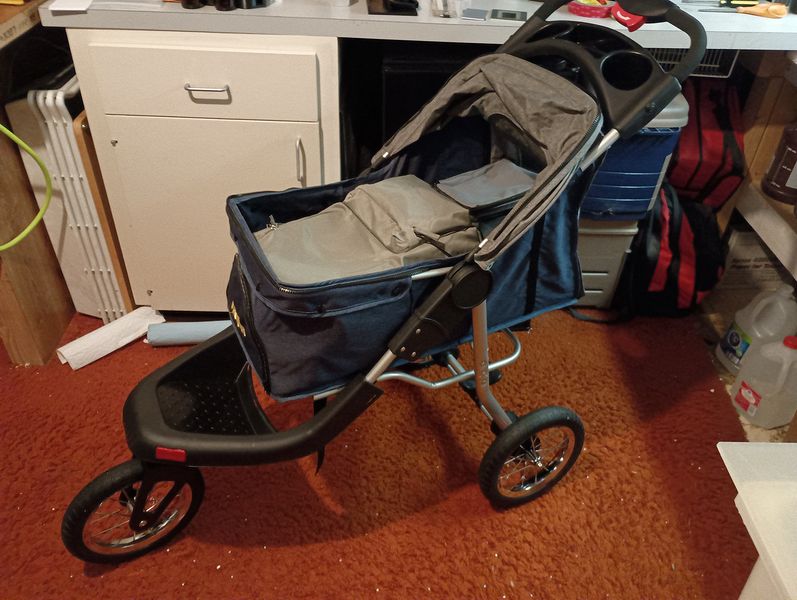
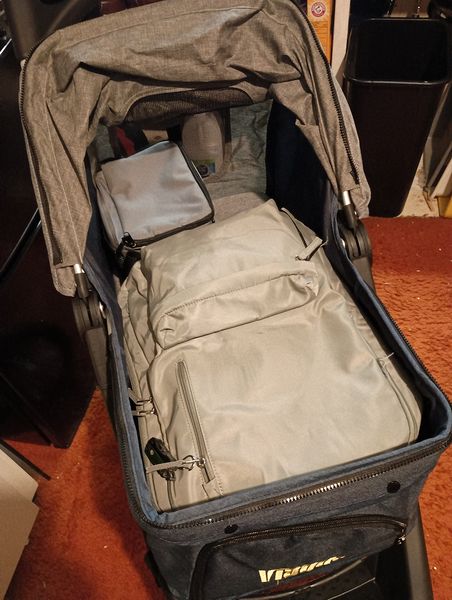
I removed the zip on cover extension for the top and folded the permanent portion back. In use the folding part will be nice out in the hot sun to prevent any more heating of the contents than needed. My camera backpack fits perfectly, the only issue after our initial test drive is the backpack needs to be lifted most of the way up to unzip it. Minor issue IMHO, however I may look into alternative storage solutions. With the camera backpack and the film holder case in place there is a 6x8 inch area for other items like filter pouch, Graflok Backs, meter and roll film back.
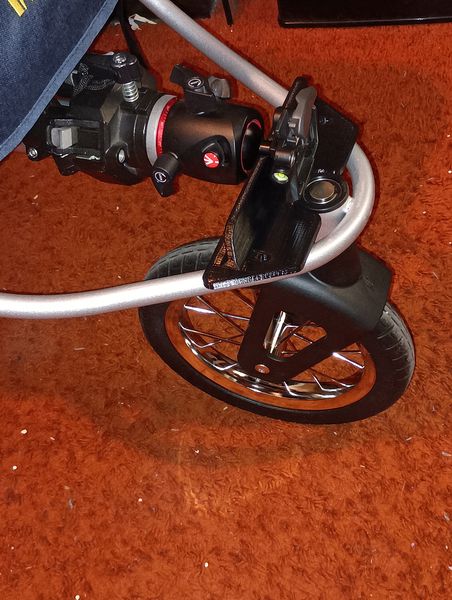
The plan is to store the tripod in the lower area, and the soft sided compartment provided is useless for this purpose as I suspected it might from looking at the images prior to purchase. A test fit of the tripod (Bogen 3021 legs with a MHXPRO-BHQ2 ball head) is shown at the right. Length of the storage area is good, just need to figure a way to store it...
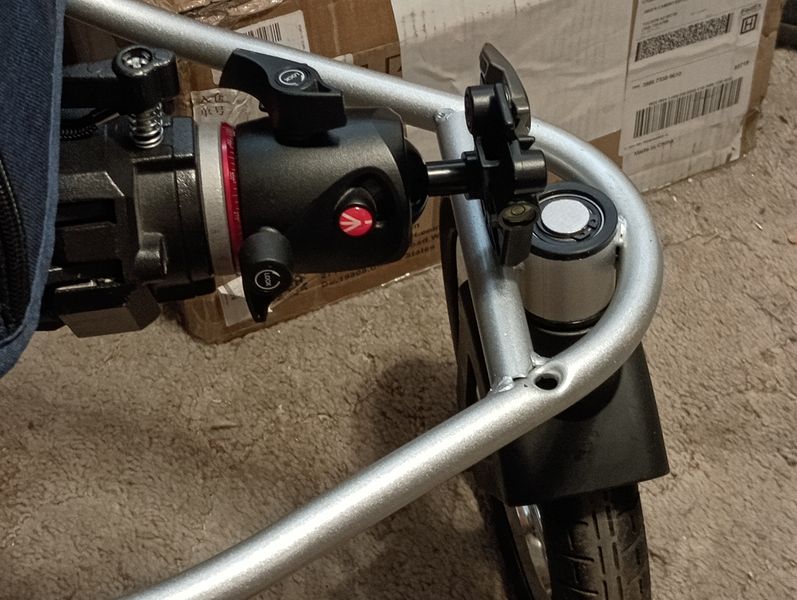
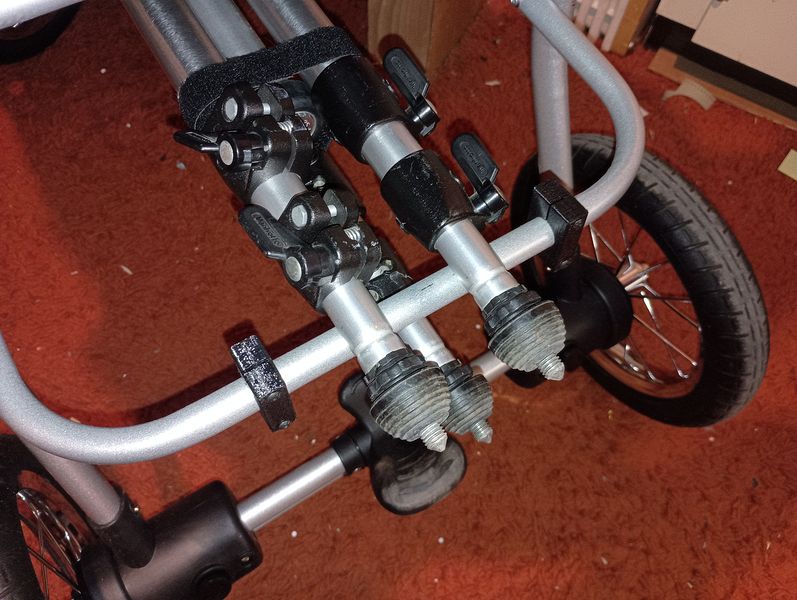
Our test drive at the Desert Botanical Garden (11/14/25) proved the concept, but the plastic tray had to go mainly because it seems it has to be removed for folding. The legs hook nicely over the cross bar at the rear of the stroller and then top of the tripod is well placed at the front. All that's needed is a couple of brackets. The feet of the tripod never came off the bar, but did slide from side to side, so some sort of 3D printed brackets will be needed to prevent that.
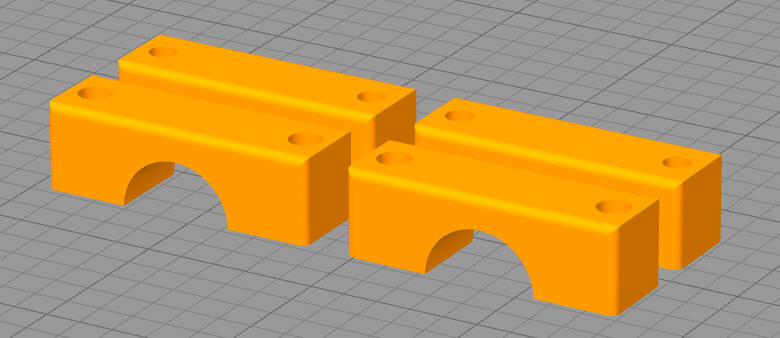
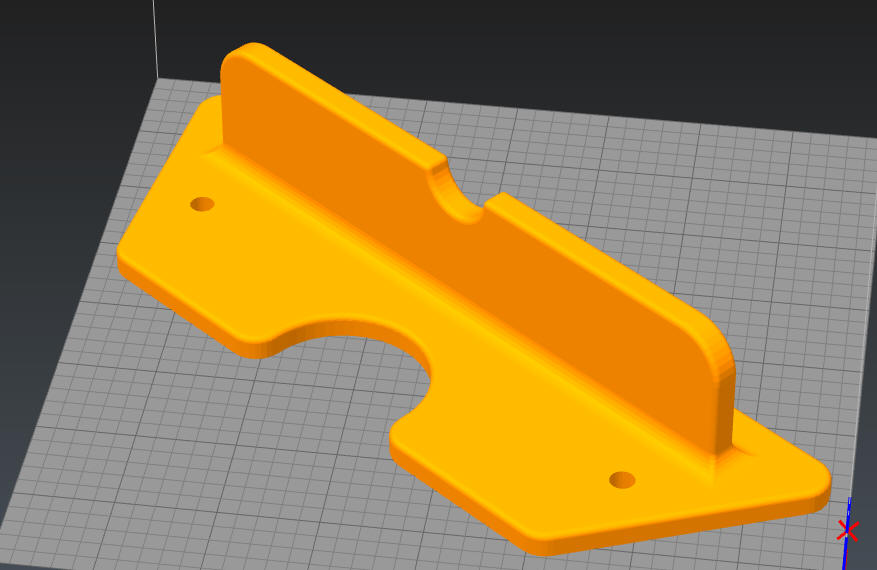
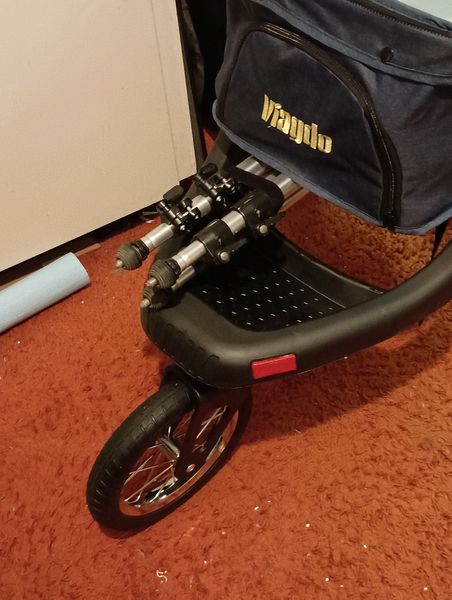
Simple split clamping blocks will keep the tripod feet near the center of the cross bar. I designed a front bracket that will bolt into two existing holes and has a notch that the shaft of the ball head immediately below the quick change will rest.
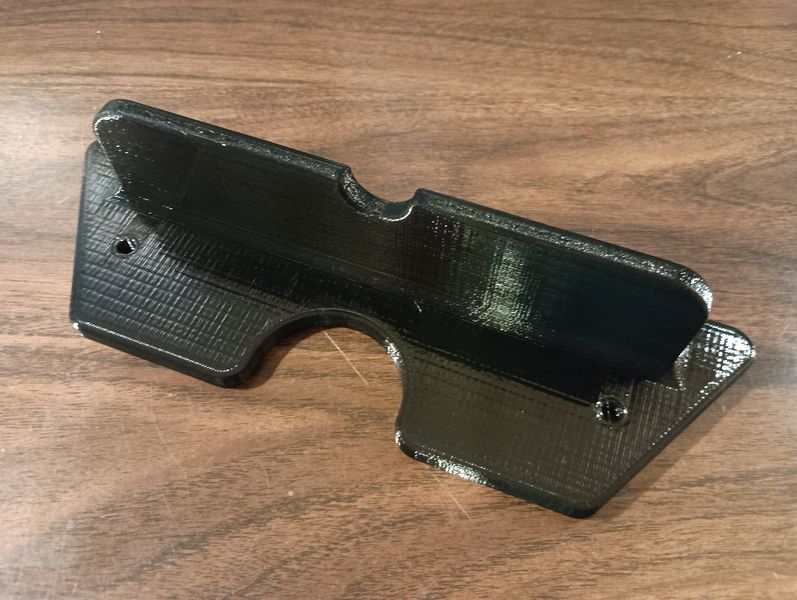
Front Support Bracket
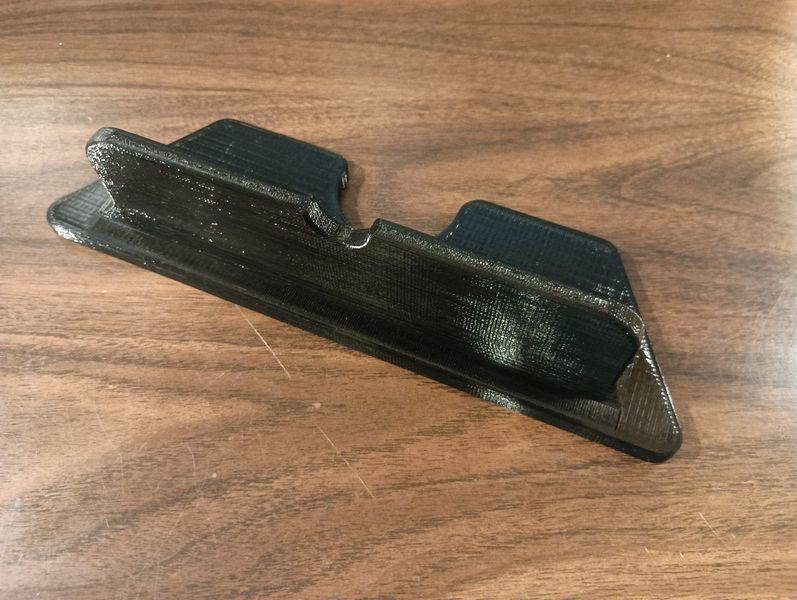
Finished 3D print, I was amazed, the bolt holes matched up perfectly!
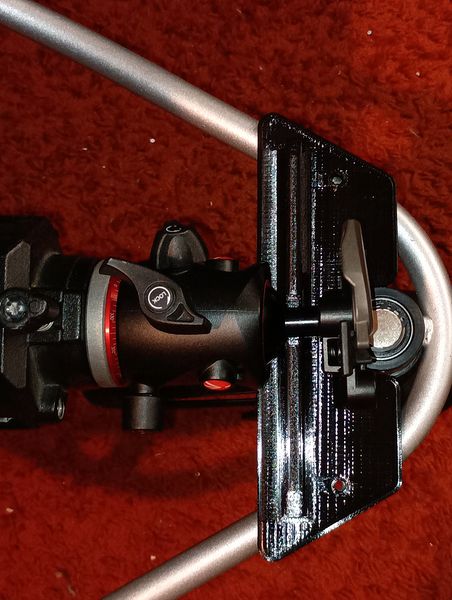
Bracket in place, but not bolted down in this view. Fits like a charm!
Rear Support Hardware
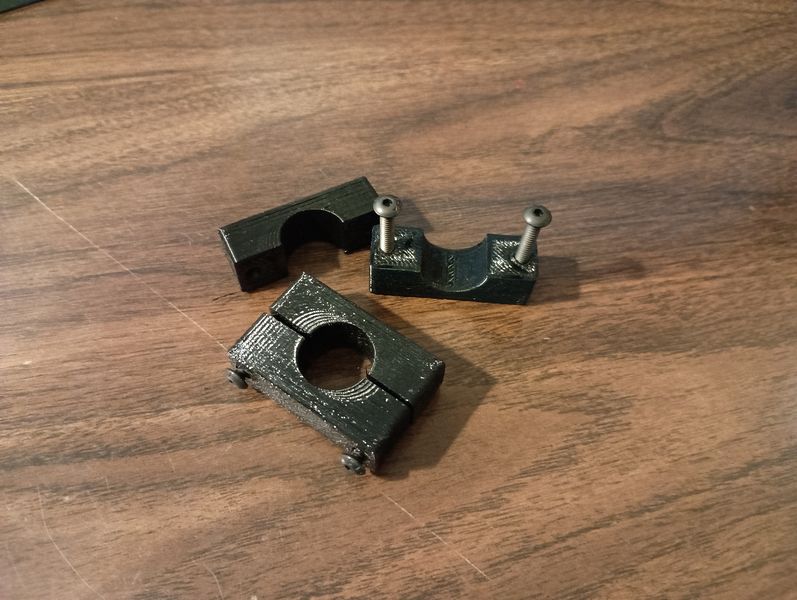
Here are the completed parts for the leg stops which have been installed in the RH picture. These are not actually needed, but I elected to add them to prevent marring of either the tripod or cart. BTW, the "Stainless Steel construction" appears to be mild steel that has been coated. A magnet readily and strongly sticks to the frame parts.
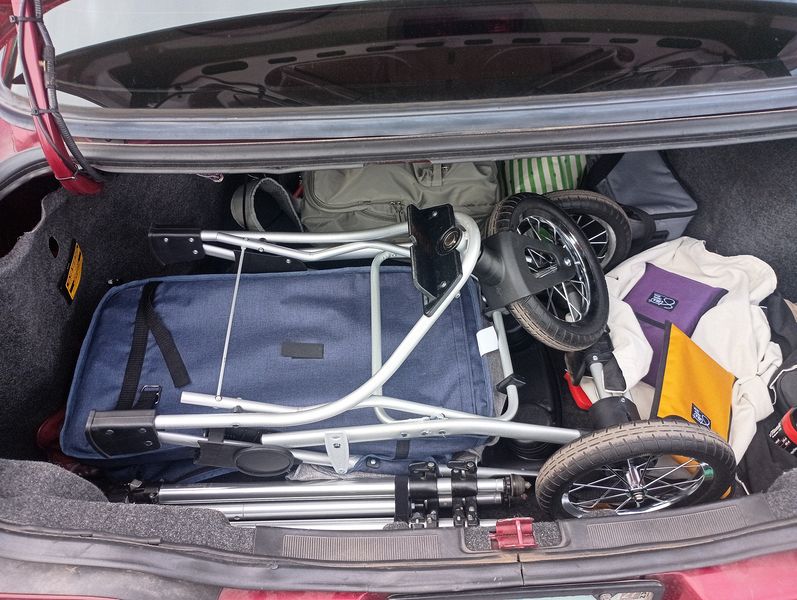
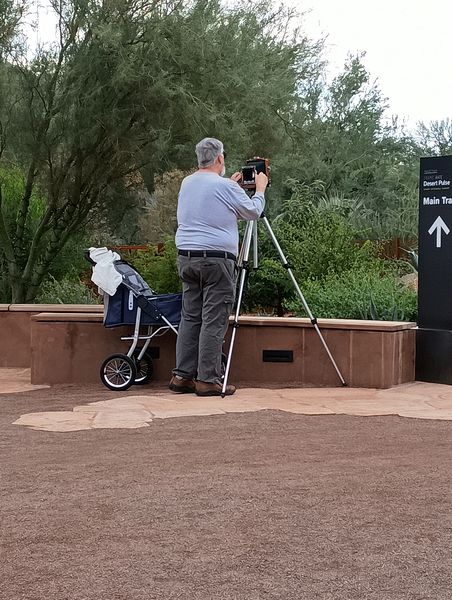
We went back to the Desert Botanical Garden for a second test drive November 21st 2025. The tripod brackets worked very well. It fits nicely in the trunk of the Taurus we drive on our excursions. If the trunk were 2" longer fore/aft I could rotate it 90 degrees CW. The trunk of our Mazda 6 is not quite as easy to fit the cart inside, like some wooden puzzles it has to be oriented carefully to get it into the trunk and then positioned so the lid can close. The one thing I learned this morning on our second outing is to ALWAYS remove the tripod BEFORE you press the folding button! Once it has started to fold it will require two people to extract oneself from this unfortunate predicament. Fortunately the lesson is strong enough that it likely will not happen again...
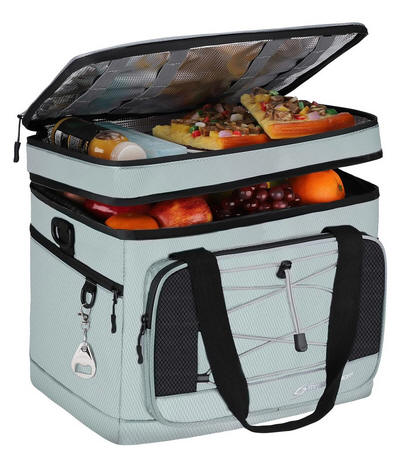
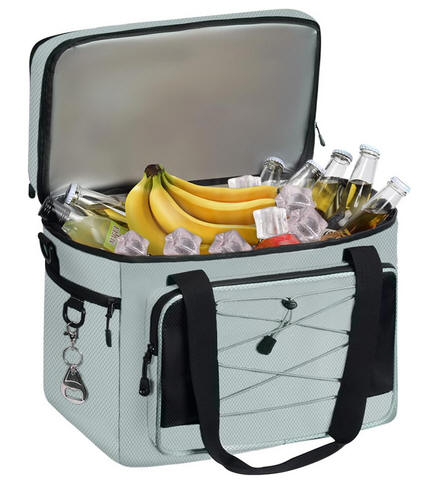
I decided to see if I could find an equipment bag that would be easier to open and close while sitting in the cart and found this online for $36. Marketed by Maelstrom on Amazon (where else?) it is sold as a 60 can soft cooler bag. Comes in a variety of colors and sizes. The top compartment is foil insulated along with the padding and the body of the cooler is well padded and insulated.
It is 17" wide, 11" deep and 13" tall. The part that attracted me to this cooler, and I looked at a lot of them, was the small upper compartment. Perfect for the Minolta Spot Meter 5, note pad, pens, cable release and all the other gee-gaws that go along with the hobby. The underside of the lid has some elastic strips that will be helpful holding pens etc. There are a couple of outside pockets that will come in handy I am sure, however the complimentary bottle opener will likely be left at home.
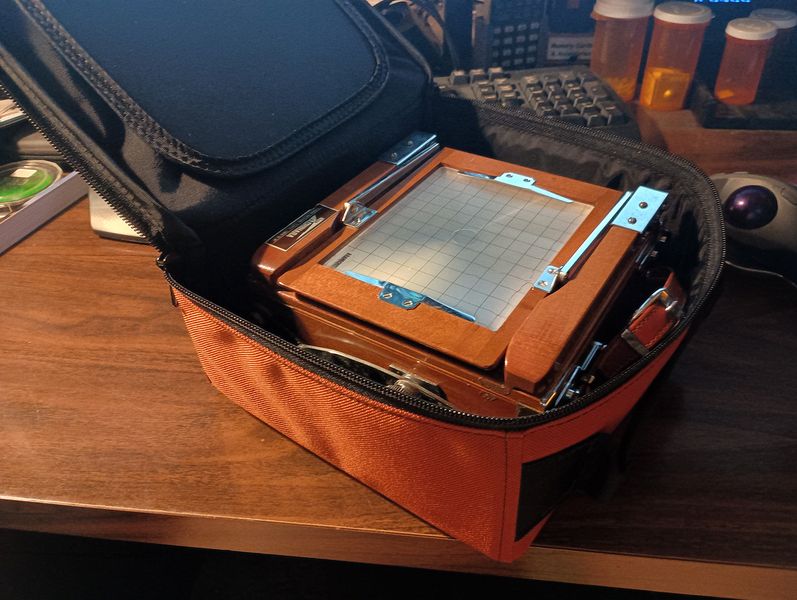

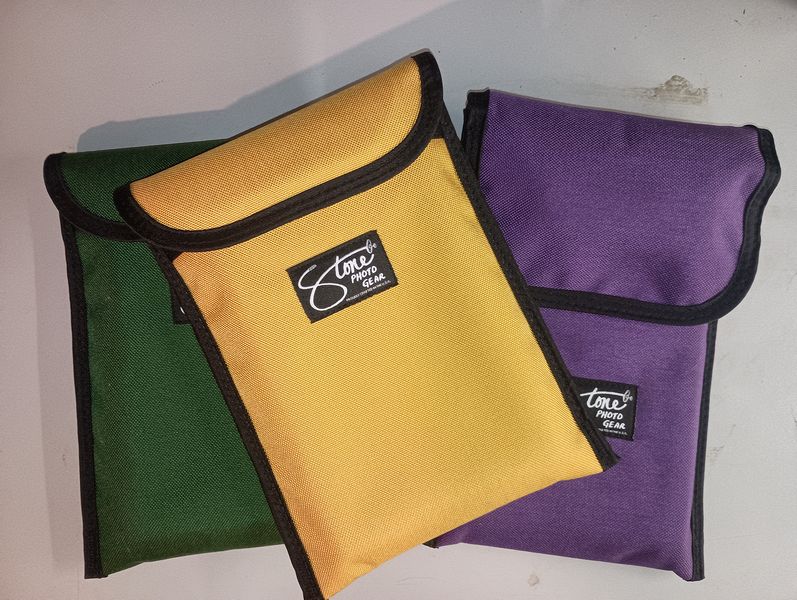
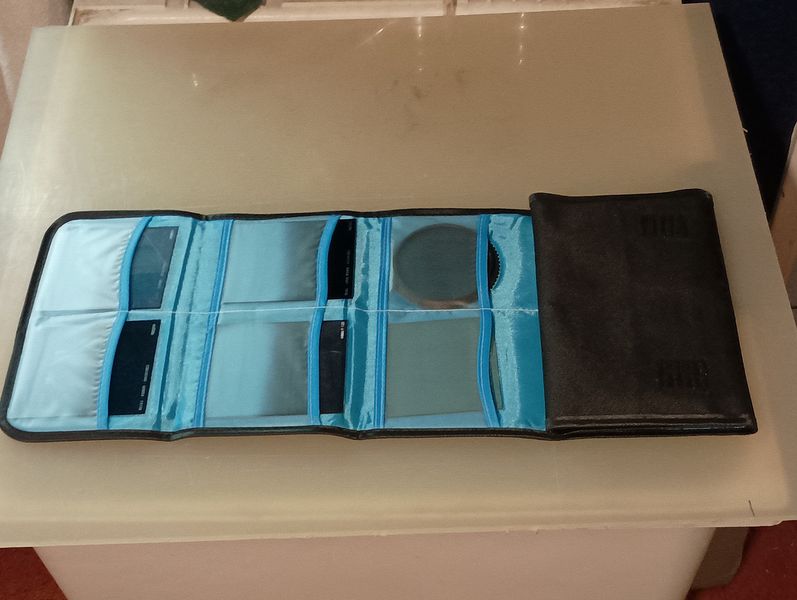
I keep my lenses in Domke style wraps and have a beautiful case obtained from Dan Stone for the Tachihara as well as the Cambo Roll Film holder (purple) and the Grafmatic holders. I use the Cokin P Series filters and found a nice "wallet" to store them. It holds 12 and protects them very well.
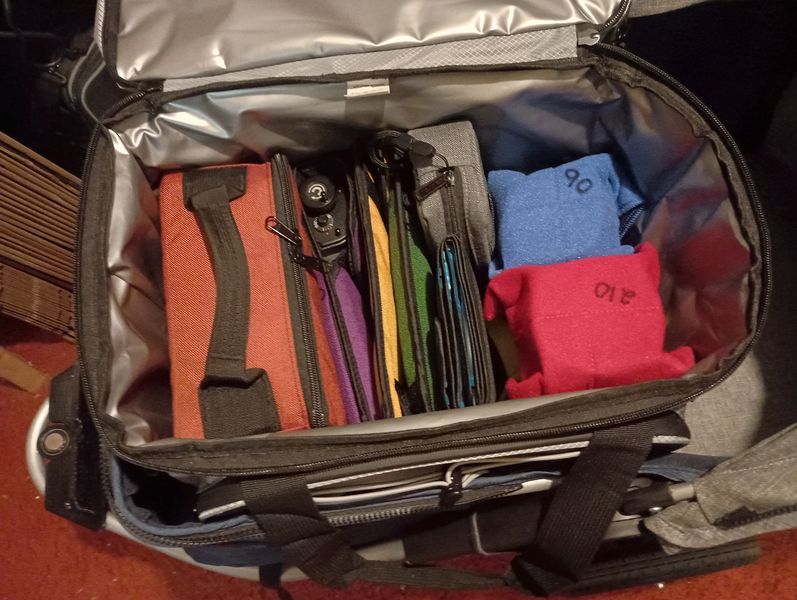
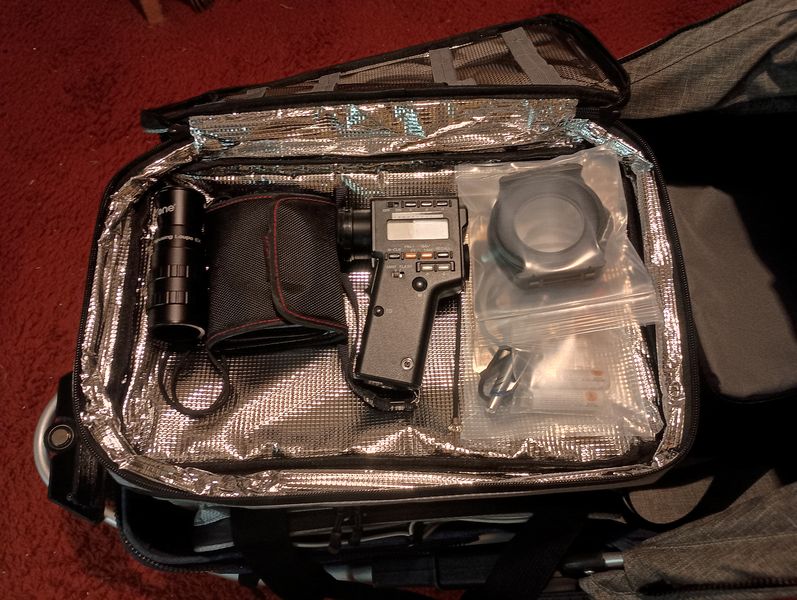
Here is the initial test fit of the equipment. Five Lenses in wraps, the camera, two Grafmatic holders, Cambo Roll Film Holder and my Sekonic meter all in protective pouches. The upper compartment has the other various small items that will not be packed in pouches so they are easier to use. I have two bundles of 10mil Ziploc style pouches that I can cut down and heat seal into smaller sizes. The adapters for the Cokin filet system are shown in the upper right.
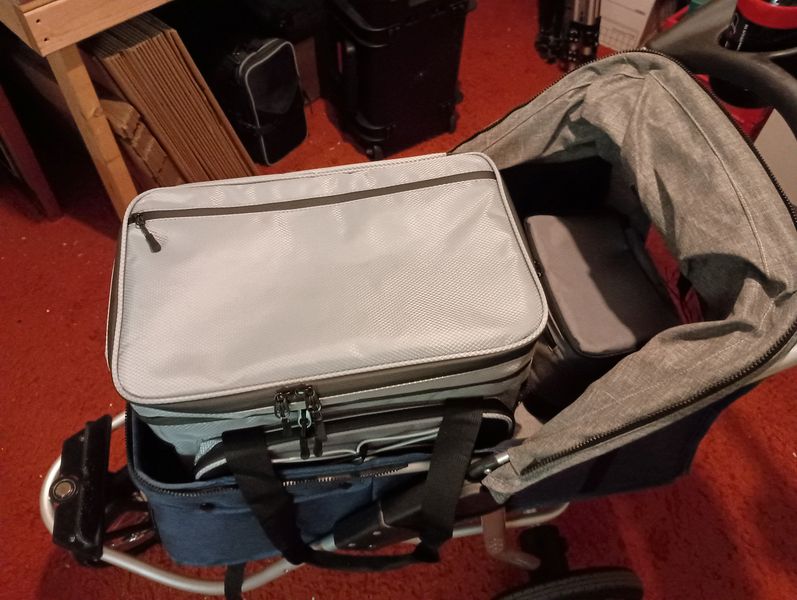

The film holder bag sits behind the cooler bag and there is room for additional items. My Zone VI heavy dark cloth packs on top of the film holder bag.
Large Format Cart I
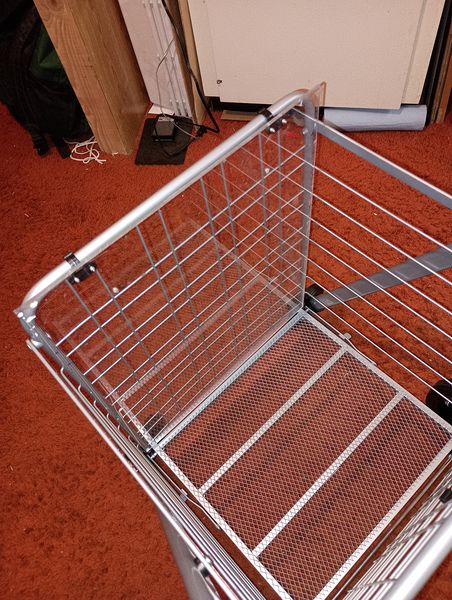
After testing of the cheap grocery basket, I obtained a much better folding Cart/Basket that was a bit larger and much heavier built. All the Amazon reviews that I looked at commented on (in no particular order) big wheels, wheel brake, mesh bottom, very sturdy, rolls over rough ground and on and on...
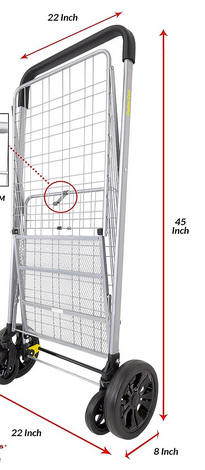
The unit met all my needs and expectations and was roomier to prevent banging up the hardware. The screen mesh bottom is what was needed to prevent the tripod legs from dropping through the openings in the wire. Sturdy padded tubular handle and more robust (and much larger) wheels!
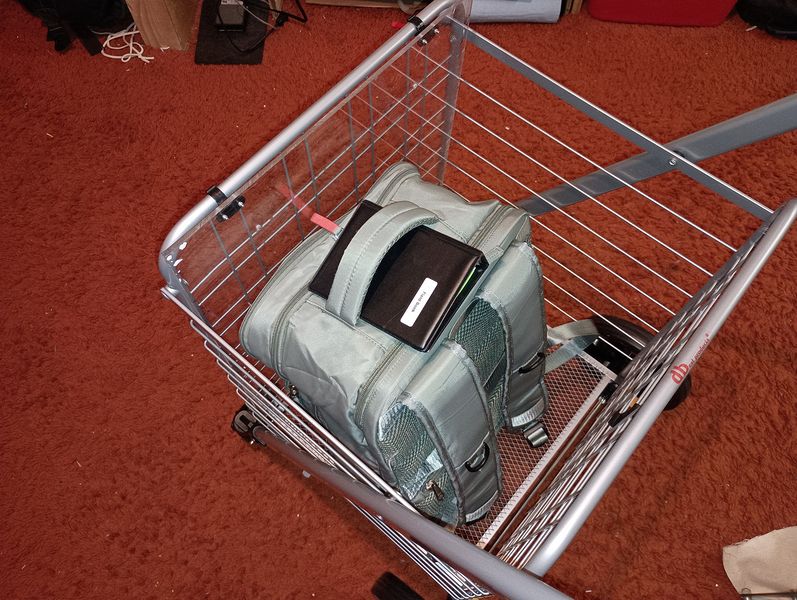
The only modification required was a platform to lay the open backpack camera bag on when in "picture taking mode". This was solved by a piece of 1/4" acrylic sheet with some clips attached to keep it in place both in use and when stored. The clips I obtained from McMaster Carr did the trick. They were $4.50 each but worked so well I am quite pleased.
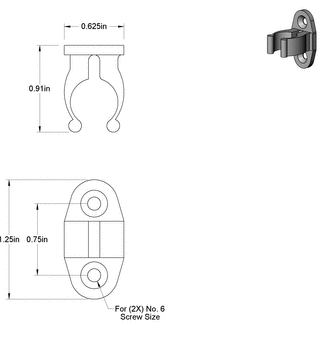
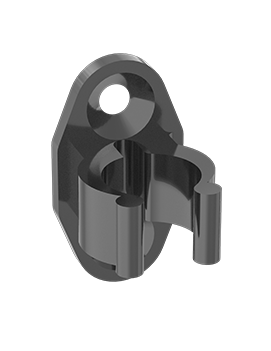
The neat thing about this is the clips are also used to keep the platform in place when stored on the inside of the basket and folding is not impeded.
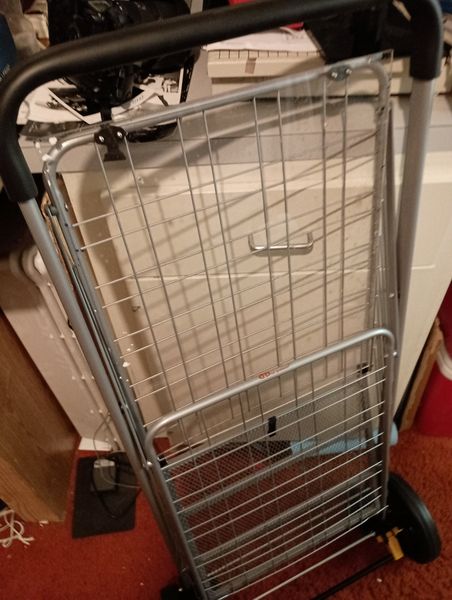
The platform clips to the inside of the basket front wall and is totally out of the way. Basket folds nicely with the platform stored.
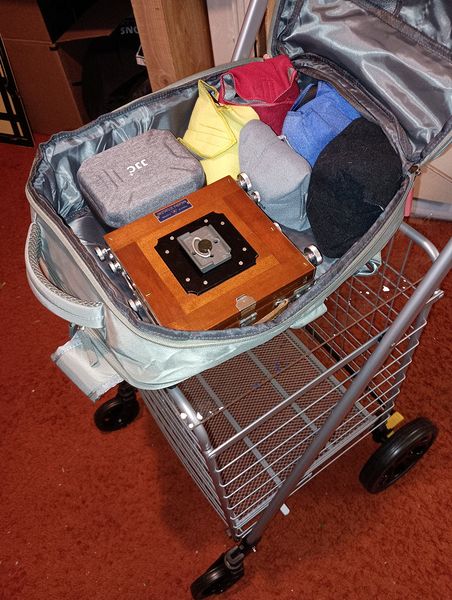
Plenty of room for other things and to stand the tripod up in one corner. With the locking wheels (ratchet NOT friction) you have a comfortable height work platform that you do not need to chase around or lean down (important for me after two back surgeries) to the ground. The only downside was where to put the film holder bag and any other accessories like the Cambo Roll Film Holder.